Rendering Arnold
Wall Rendering Arnold | Fronts, Gables & Extensions
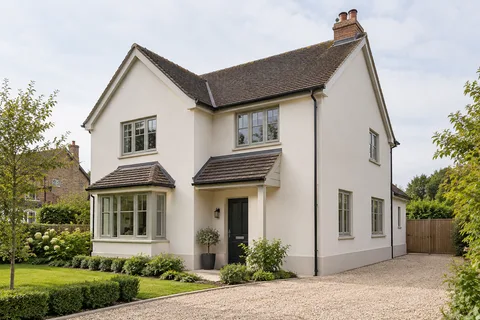
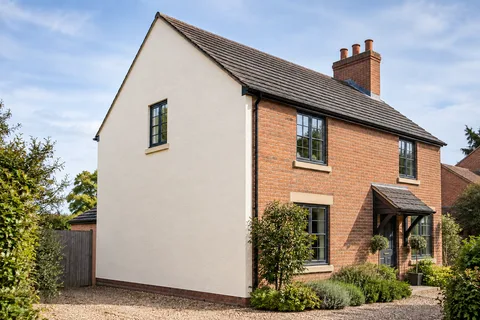
A single wall can need a new finish without the rest of the building needing replacement. The project might concern a front elevation, the side of an extension or a gable with widespread failed material. Wall rendering in Arnold should define that face clearly, including its edges and the work needed around openings. The smaller scope makes those boundaries more important, because the new finish must meet surfaces that remain in place.

On this page
Decide what the new surface is meant to change
An owner may want a consistent appearance after building an extension, a different texture on a frontage or replacement of damaged render. Explain the intended result before choosing the product. It helps the contractor distinguish a new finish project from a repair or decoration job. A surface that looks dated is not necessarily detached, and a clean-looking surface is not proof that the layers beneath are sound.
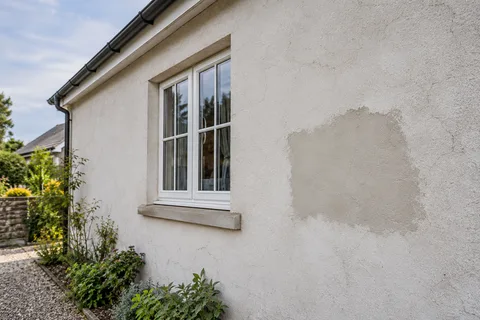
For limited defects, the render repair page describes the assessment of cause and extent. For a suitable retained finish with an unwanted colour, recolouring is a different route. The decision should follow the wall's condition and the desired outcome. A complete new rendered face should not be presented as automatically necessary before those alternatives have been considered where relevant.
- Set the edges Decide where new render stops against brick, stone or an existing finish.
- Prepare the background Remove loose material, repair masonry and prepare suction and surface key. Existing paint needs a specified removal or alternative treatment.
- Base coat Built up to level the wall, with mesh where backgrounds change or crack.
- Finish Matched to the rest of the house or chosen as a deliberate contrast.
- Shed the water Copings, sills and the base bead keep rain off the top and away from the bottom edge.
The usual order of work. The survey and the chosen products decide the actual steps.
Draw the perimeter of the work
Show the top, base and side limits on a photograph or drawing. Include reveals, returns and any area above an attached roof. The visible central panel may be easy to measure while those small areas account for several separate details. If they are excluded, say so; if they are included, the access and preparation need to allow for them.
The finish may end at a corner, retained brick band or another designed boundary. A join across one continuous face can be more obvious than a change in plane. Decide how that will look before the work starts, while also respecting the technical needs of the system. An attractive stop line should not override an existing movement detail or extend the work beyond the agreed property boundary.
Assess the layers and junctions underneath
Brick, blockwork, old render and filled openings can appear within the same elevation. The specification needs to account for the backgrounds that are actually present. If their condition cannot be established without investigation, make that stage part of the scope. Do not assume that a common top colour makes different substrates behave as one uniform wall.
Where pebbledash removal is proposed, the prepared masonry may change the replacement decision. A hard coating can conceal earlier alterations or fragile material. A trial should help establish the method and effect of removal. It should not be used merely to confirm that stripping can begin while the replacement specification ignores whatever is revealed behind the old surface.

| Position | What the survey should establish |
|---|---|
| Top | Roof, coping and weathering arrangement |
| Sides | Connections to retained construction |
| Openings | Frames, sills and reveal geometry |
| Base | Ground levels and construction detail |
Choose the material and sample for that elevation
Silicone and monocouche can create different surface characters on suitable backgrounds. Lime may be relevant where the construction needs a compatible traditional material. The choice should include the full proposed treatment, not just the final shade. If a painted finish is part of another specification, include its preparation and decorative stage clearly.
A front elevation seen from the street and a side wall viewed along a narrow passage can show texture differently. Put a representative sample in the intended setting and compare it with retained materials. The front-refurbishment article considers the visible extent, while monocouche versus thin-coat finishes separates their appearance and system roles without ranking one as right for every wall.
Detail openings and the lower edge
Sills, frame junctions and roof protection should relate to the finished face. At the base, account for ground levels and the existing building construction. A new decorative layer should not casually cover functional openings or hide an uncertain junction with paving. Those details can affect the work even where the broad wall area is small.
For an insulated wall, the added depth requires a coordinated design around those interfaces. The article on insulation at window reveals explains the questions to establish before installation. Render-only work and insulation can look similar from a distance, but they do not have the same underlying design or scope. Keep them distinct when comparing quotations.
Make access and related trades part of the proposal
A gable above a lower roof or a wall beside a boundary can be awkward to reach. The competent team needs to plan suitable working access and protection. Identify any permissions or neighbouring arrangements required and who handles them. A photograph showing the wall's colour does not establish that the proposed equipment can be installed safely in the available space.
Pipes, lights and service equipment may need removal or adjustment by the appropriate party. Give those tasks a place in the sequence and state how they are reinstated. A completed face should not be left with an unresolved strip behind a fitting or a pipe discharging onto it. The cost guide helps compare the complete scope rather than just the material application.
Inspect the defined face before closing the job
Review the wall against the agreed boundaries, sample and details. Include high returns and low edges while suitable access remains available. Keep the product references and photographs of any important background repairs. If the wall is part of a later whole-house scheme, those records will help the next phase relate to the work already completed.
The Rendering Arnold homepage links all the services for future maintenance or changes. A single-wall project should finish with a clear account of what was treated, how it meets retained surfaces and what care it needs. That is a more useful result than an attractive central panel surrounded by small unresolved tasks that were never identified in the original quotation.
Common questions
Can a single gable be treated without changing the other walls?
A defined gable project can be considered separately. The condition and construction need assessment, and the proposal should explain where the finish ends at corners, roof edges and adjoining surfaces. Similar colour alone does not resolve those technical boundaries or make a single-elevation project identical to whole-house work.
Will a new wall finish match weathered render beside it?
The existing material may have changed in colour and texture over time. A representative trial can help discuss the likely relationship, but an invisible match should not be assumed. Agree whether the result is a distinct panel, an acceptable local difference or a larger suitable finish area chosen for appearance.
See housing and planning information for Arnold and nearby places, including the source and geography behind each figure.